There are many ways your users can invite guests to their sites – they can share a site itself or make the users part of the Microsoft 365 Group/Team. However, there is one other method that is only available to Office 365 Admins. They can invite external users via Azure AD. In today’s post, I want to explain what this is all about and why it might be beneficial over the other methods.
What happens when users share a Site, Group or Team externally
When you share a site, Microsoft 365 Group, or a Team externally, the recipient gets an email with an invitation to join a site, group, or team. Once the user accepts the invitation, the user’s ID ends up in the Microsoft 365/Azure Active Directory, clearly identified as a guest.
Why invite external users via Azure AD?
There is another way to invite external users to your tenant. And that is by inviting them via the Azure Active Directory. There are several benefits to inviting external users using that method:
You would like to set up the users as guests upfront, without inviting them to any specific site or team
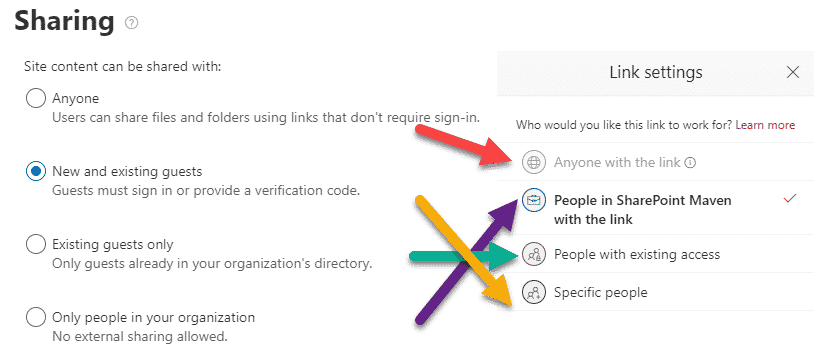
You only allow external sharing to the existing guests only (a setting in the SharePoint Admin Center.) That will prevent regular users from sharing their sites/teams/groups with anyone they wish and would only force them to pick guests that already exist in the Azure Active Directory
Related to the first point, you need to bulk invite multiple guests at once – this option is only available in Azure Active Directory
How to invite external users via Azure AD
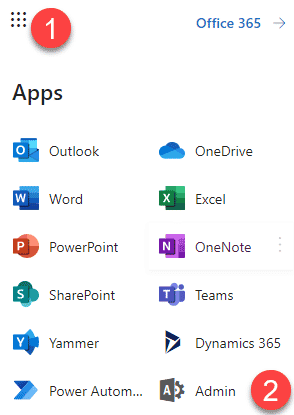
Office 365 App Launcher > Admin
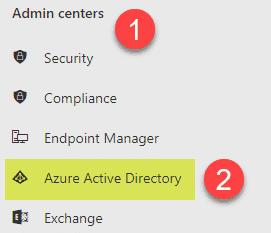
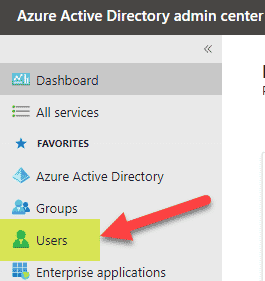
Under Admin centers, click on Azure Active Directory
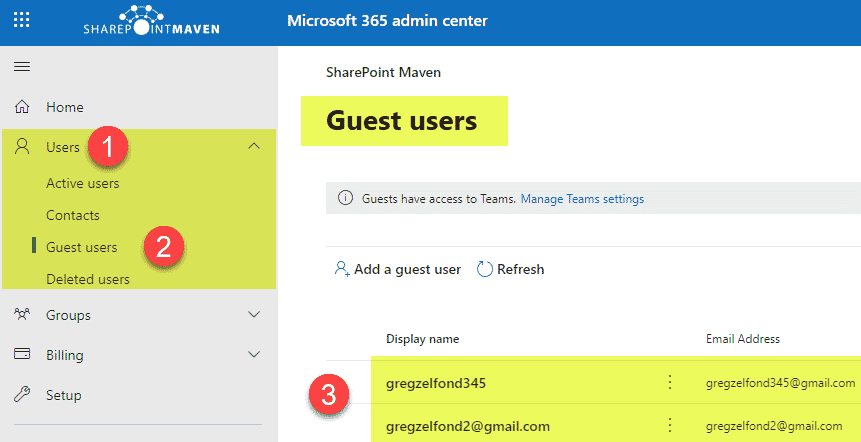
Click on Users
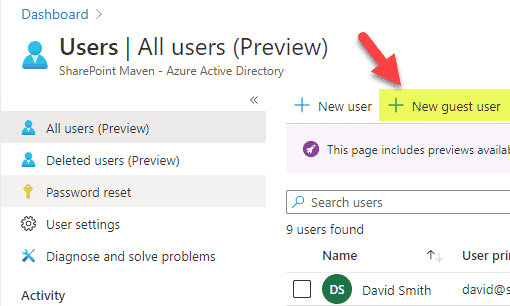
Click on New guest user
Complete the necessary information (most fields, except for a guest email address, are optional). Click Invite.
Experience for the guests (external users)
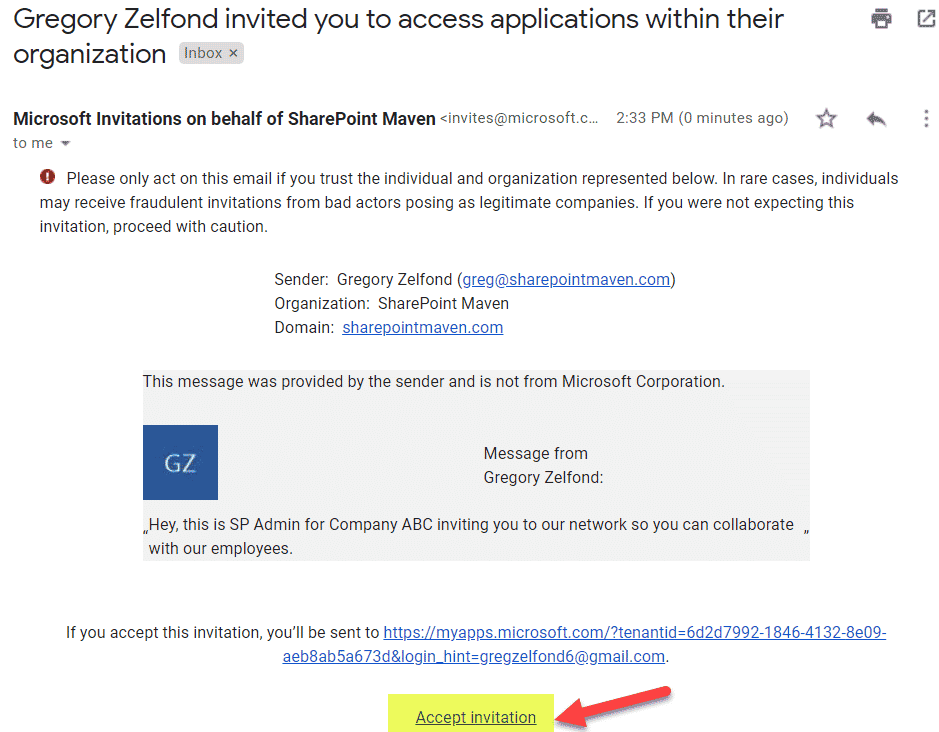
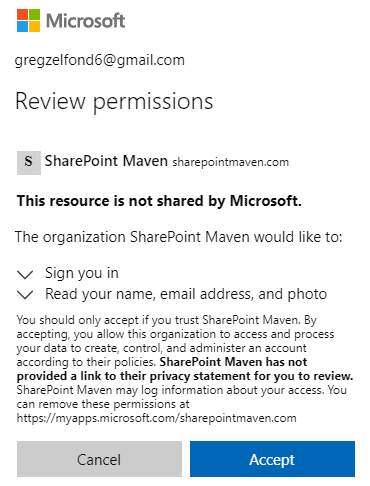
The recipient receives an email like the one below. Clicks Accept Invitation.
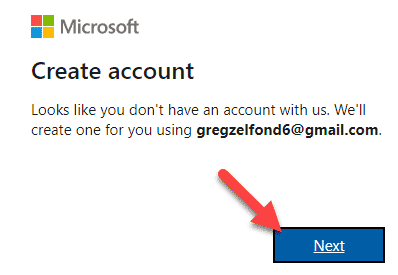
If the user’s email has previously been authenticated with Microsoft (i.e., used on Windows, Xbox, Skype, used in another Office 365 tenant), then the user would just need to type in the password at that point. I will document the worst-case scenario – the user never used this email for any Microsoft services. So the user clicks Next to create an account.
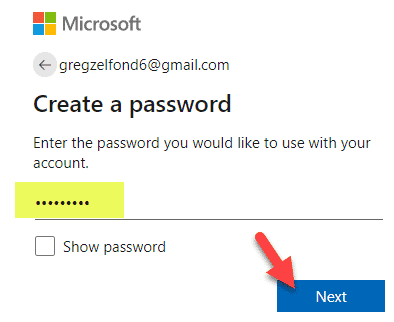
The user chooses a password, clicks Next
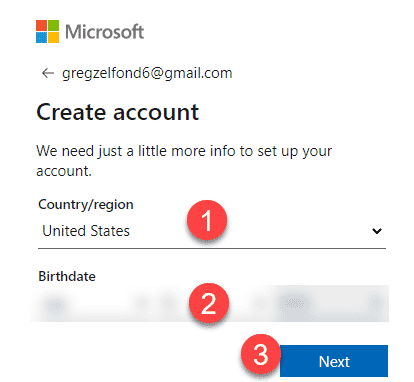
A quick validation step…
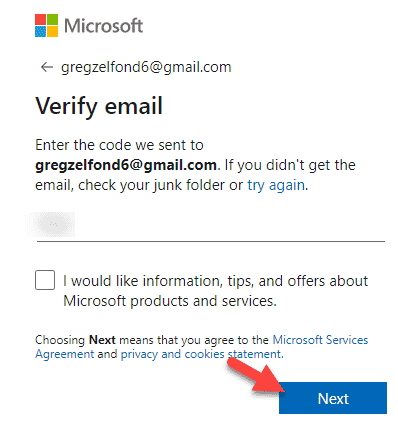
And another one…
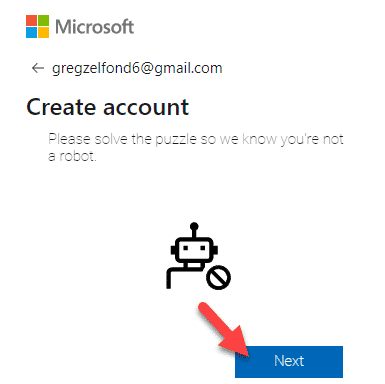
Oh, come on, I am indeed a human!
Man, I need a drink to solve this puzzle…
Actually, I know what to do here…
I solved it!!!
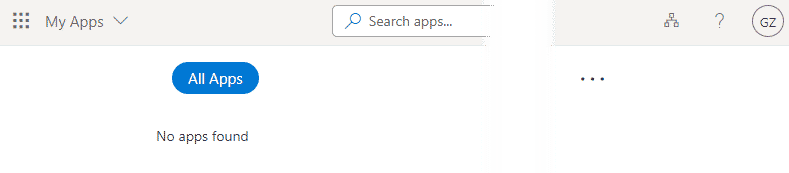
Finally, the user ends up on this screen, which is not really user friendly at all
What happens after you invite external users via Azure AD
Once you invite users via Azure AD and they accept the invitation using the instructions above, they end up in your Azure AD, clearly identified as a guest.
Have you ever wondered how to organize your documents in a Microsoft Teams Channel just like views in SharePoint? Views in Microsoft Teams Recently I discovered Views in Microsoft Teams. … Read More
PowerPoint Presenter Coach now available on all platforms We love hearing feedback from our customers, and we’re excited to announce that PowerPoint Presenter Coach is now available on all platforms. PowerPoint Presenter Coach was first introduced in PowerPoint for the web, and both students and professionals have been utilizing this feature to become more confident…
In a time of hybrid work business leaders want to empower people to come together and share their best ideas. We want to help with solutions that are fluid, dynamic, and cloud powered to enable collaboration from anywhere. Over the past year, we’ve learned a lot about working remotely, but recognize that spontaneous creativity and…
Power Automate Desktop becomes available to Windows 10 users and comes with new updates in the latest March 2021 release, including shared flows, console settings, flow designer enhancements, new actions and the use of variables in the recorders.
Just a quick one today. I saw on Twitter that the latest version of the Microsoft Teams PowerShell module, version 2.0 has been released. And while that on it’s own isn’t particularly exciting or newsworthy. There are some changes with this release that are worth noting.
Use Connect-MicrosoftTeams as the single command to login and manage Teams and Skype for Business online. New-CsOnlineSession is no longer required to login and manage Skype for Business Online.
This will require a minor update from your side and make changes as documented here.
No need to use Enable-CsOnlineSessionForReconnection to run long scripts or stay connected.
How to update
First you need to uninstall the SkypeOnline PowerShell module. Follow these steps on how to move from Skype for Business Online Connector to Teams PowerShell module.
After that you only need to install the MicrosoftTeams PowerShell module. In an elevated PowerShell or ISE run teh following. I use Force to update from a previoud version.
I use one script to authenticate and connect to Micorosoft Teams, Exchange and Azure AD. Just replace your.adminuser@domain.com with your admin username. And change the location of your Password file
#You need to run this first to save your password as an encrypted file
#Read-Host “Enter Password” -AsSecureString | ConvertFrom-SecureString | Out-File “C:ScriptsPassword.txt”
#Authenticate and connect to a new Microsoft Teams PowerShell session
$Username = “your.adminuser@domain.com”
$Password = cat “c:Scriptspassword.txt” | ConvertTo-SecureString
$Creds = New-Object -TypeName System.Management.Automation.PSCredential -ArgumentList $Username, $Password
Connect-MicrosoftTeams -Credential $Creds
#Authenticate and connect to a new Exchange Online PowerShell session
Connect-ExchangeOnline -Credential $Creds -ShowProgress $true
#Authenticate and connect to a new Azure AD PowerShell session
Connect-MsolService -Credential $Creds
#Authenticate and connect to Azure AD using the Azure Active Directory PowerShell for Graph module
Connect-AzureAD -Credential $Creds
If you use MFA, storing the creds won’t work. You’ll get an error if you try.
Once connected to Teams PowerShell, you’ll see that all Teams and CS (communication server/SkypeOnline) commands are available. Don’t believe me? Run the following
If you run a get-command -Module MicrosoftTeams | measure you get 568 commands
Wrap up
Not having to use new-csonlinesession to get at the SkypeOnline commands is a huge win. This means you get all of the commands you need in a single connection. And because, unlike the SkypeOnline PowerShell module, the Teams PowerShell module sessions stay connected until you close out or disconnect, you can run it all day without disconnects, either just to stay connected and dip in and out to do specific tasks or you can run long scripts for big jobs.
This blog post is part of a series called “Learn ACS“, all about Microsoft Azure Communication Services. The series covers a high-level overview of capabilities and considerations, then dives into the development detail of using ACS in your application. Find the rest of the posts in the series at learnACS.dev.
I’ve been posting daily for the last 15 days and so this will be the last daily post for a little while. I am definitely going to be adding to this series because there are so many areas of Azure Communication Services that I haven’t had a chance to write about yet, but… just not daily!
Today, we’re going to look at something different. We’ve spent a lot of time looking at the VoIP calling platform in ACS, but today I want to explore the chat platform a bit. Inside Azure Communication Services is a full platform for hosting text-based chat, either alongside calling or completely separatly. It also supports Teams Interop to meeting chat, but that’s a subject for another blog post.
The way chat works in ACS is slightly different from how calling works. With calling you could either call someone directly, or use an ID to start or join a group call. With chat, you first need to create a chat thread before you can join it. Further, only people you explicitly name as participants can join the chat, although once they’ve been added they can themselves add more people. This makes our sample code a little more involved because we need to cover creating a new chat thread, joining a thread and adding new people, if we want to have a demo that shows chat working.
Chat services are delivered via a different package so it’s necessary to install that before we do anything else. I’m going to assume you’ve copied one of the earlier samples – anything from Day 5 onwards will be fine.
The chat service code needs to know the URL of your Azure Communication Services endpoint. You can find this by going to the resource in Azure and copying the Endpoint value from the Overview page.
In addition to the other instructions for getting Day 5 up and running, add in this one to install the communication-chat module:
npm install @azure/communication-chat
Here’s the code: don’t forget, on Line 16 replace the placeholder text with your endpoint URL, and on Line 19, replace the placeholder text with the full URL of your Azure Function created in Day 3, including the code parameter:
index.html
client.js
Testing it out
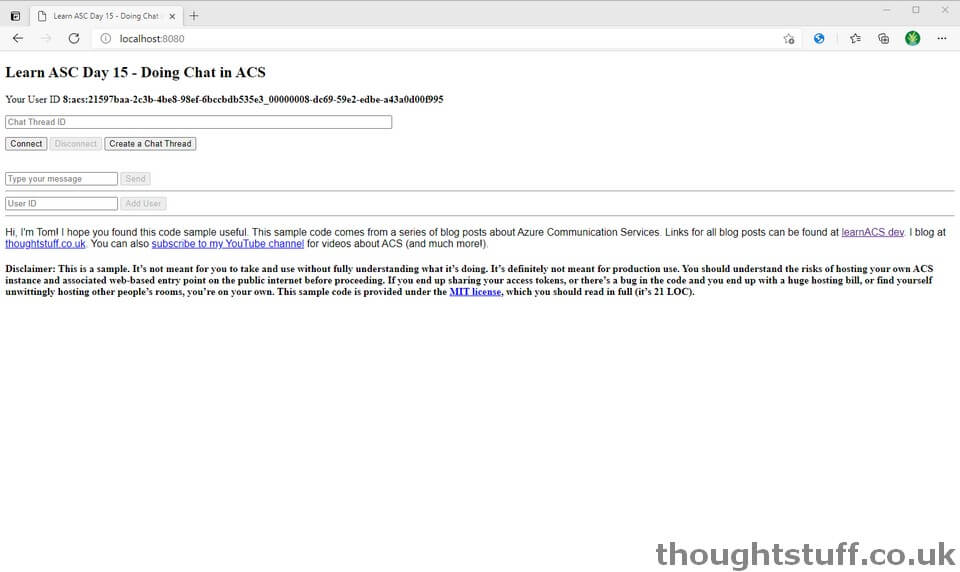
We need two browsers running to test this out, so once you’ve used a command-line to run this command, browse to the sample application in your browser (usually http://localhost:8080), and then open a second private browsing session to the same address:
There’s a few things going on here, so here’s a walkthrough you can follow to try everything out, and then you can play around with it after that.
Browser 1 – before we can do anything we need to create a new chat thread to chat in, so click the “Create a Chat Thread” button. You should get an alert with the new ID, which is also placed into the Thread ID box.
Browser 1 – the new chat thread is created, but we haven’t connected to it yet. Click “Connect” to do this. Now we’re connected, but a chat of 1 is a lonely place.
Browser 2 – we need to connect to the chat instance that was created in Browser 1, but before we’re allowed to do that we have to be added as a participant. So, copy the User ID from Browser 2 to your clipboard
Browser 1 – Once you’ve connected to the chat thread, paste the User ID into the User ID box at the bottom and click “Add User”. This adds the user from Browser 2 to the chat thread.
Browser 2 – Copy the Chat Thread ID from out of the input box in Browser 1 and paste it into the “Chat Thread ID” box. Click Connect to join the chat thread created by Browser 1.
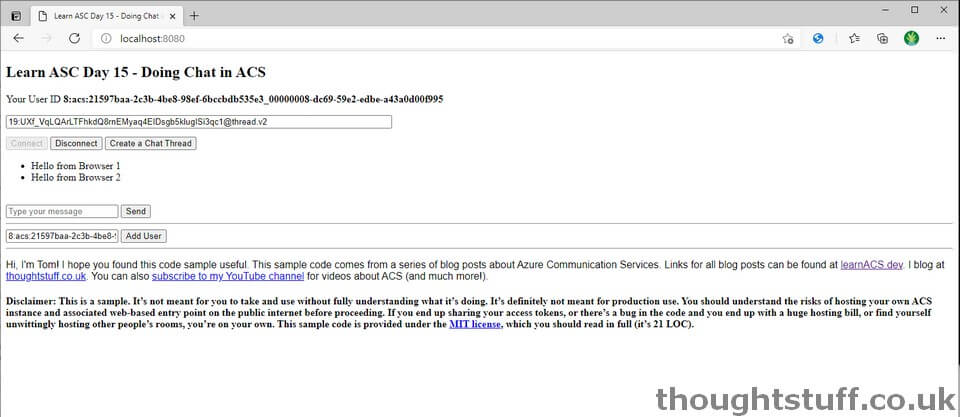
Browsers 1 & 2 – now, both browsers should now be able to send messages using the “Type your message” and “Send” elements, and see the conversation show up in the browser.
Party!
What’s the code doing?
The chat client is created in the init() function on line 32. Unlike the calling client, it needs the ACS Endpoint.
If you want to receive notifications about new messages in a chat thread you have to opt-in to them with the startRealtimeNotifications method. You have to do this before you subscribe to the chatMessageReceived event (even though that feels wrong to me!) (lines 44-52)
A chat client can tell you about notifications to more than one chat thread. Setting up chat threads, adding participants and sending messages all happens on a ChatThreadClient (not the ChatClient).
We set up a chat thread with no additional participants (line 79) but you could do so if you knew their IDs ahead of time. It’s not necessary to add yourself.
There are a whole bunch of interesting methods we didn’t explore because this sample was already large enough. You can list all messages in a chat, delete messages, send and receive read receipts, send typing notifications and more. If you’re interested, have a look at the ChatThreadClient Class Definition.
Today, we explored using the chat platform to send and receive chat messages in two different browsers. Links for all blog posts can be found at learnACS.dev. You can also subscribe to my YouTube channel for videos about ACS (and much more!).